The original museum of the Royal New Zealand Navy opened in 1974 in a single room of the main administrative building, HMNZS Philomel, at the Devonport Naval Base, and was only open to RNZN personnel for two hours per week. The museum moved to a small building near HMNZS Philomel in 1982, but this also proved too small. On 9 October 2010, the new Torpedo Bay Navy Museum opened in its current location in Devonport, at the end of King Edward Parade, being housed in refitted buildings originally built in 1896 to control naval mines at the mouth of Waitematā Harbour.
Photos taken 19 November 2016
 |
| The Torpedo Bay Navy Museum, a free museum dedicated to presenting the history of the Royal New Zealand Navy. |
 |
| A plaque marks the approximate landing site of a boat from the French corvette l'Astrolabe, under the command of Dumont d'Urville, on 26 February 1827. |
 |
The ensign of the Royal New Zealand Navy flies from a yardarm on the grounds of the Torpedo Bay Navy Museum.
|
 |
| An anchor from the German sloop SMS Adler, wrecked at Apia, Samoa in a hurricane on 15 March 1889, along with five other German and American ships. This anchor was recovered by divers from HMS Dunedin on 31 January 1930 and was presented to the naval base by His Excellency S.S. Allen, the Administrator of Western Samoa. |
 |
| The museum's first permanent gallery is dedicated to the First World War Royal Navy battlecruiser HMS New Zealand. |
 |
| The gallery tells the story of HMS New Zealand's participation in all three of the First World War's major naval engagements: the Battle of Heligoland Bight (28 August 1914); the Battle of the Dogger Bank (15 January 1915); and the Battle of Jutland (31 May-1 June 1916). The display cases contain relics and artefacts from the ship and her crew. |
 |
| A scale model of HMS New Zealand. To fund the construction of the battlecruiser, a loan of £2 million was raised, a loan that was only paid off in 1945, 21 years after the ship had been scrapped. |
 |
| A silver bell originally cast in 1905 for the King Edward VII-class battleship HMS New Zealand and later installed in the battlecruiser HMS New Zealand. |
 |
| A 1,064 pound piece of armour plate gouged from HMS New Zealand's 'X' turret by a German shell at the Battle of Jutland. |
 |
| A ceremonial hatchet and silver case. The hatchet was used by Lady Ward, wife of Prime Minister Sir Joseph Ward, to launch the battlecruiser HMS New Zealand on 1 July 1911 at the yard of Fairfield Shipbuilding and Engineering Ltd. in Glasgow, Scotland. |
 |
| A display on the Battle of the River Plate, which occurred between a British squadron (including the New Zealand-manned HMS Achilles) and the German pocket battleship Admiral Graf Spee on 13 December 1939 in the estuary of the River Plate between Argentina and Uruguay. |
 |
| The wooden 'ditty box' of Leading Seaman T.A. Hutchins of HMS Achilles at the Battle of the River Plate in December 1939. With space at a premium, sailors stowed their personal possessions in these ditty boxes. Hutchins's ditty box contains his wedding photos, a bosun's call, a pipe, and dog tags should he be captured or killed. |
 |
| A gallery dedicated to the Battle of the River Plate, in which the Leander-class light cruiser HMS Achilles, manned by New Zealanders, took part. |
 |
| A scale model of the 14,890 ton German pocket battleship Admiral Graf Spee, badly damaged by British cruisers in the Battle of the River Plate and later scuttled by her crew to avoid the ship's capture. |
 |
| A splinter from an 11-inch shell fired by the German pocket battleship Admiral Graf Spee at the Royal Navy light cruiser HMS Ajax. |
 |
| A 9mm Luger pistol like the one used by Admiral Graf Spee's captain, Hans Langsdorf (photo), to commit suicide in his hotel room in Buenos Aires following the scuttling of his badly damaged ship in the River Plate estuary on 17 December 1939. |
 |
| A display of naval ordnance fired by the ships during the Battle of the River Plate. The replica shell on the left is a 590-lb, 11-inch round like those fired by German pocket battleship Admiral Graf Spee. The replica shell in the middle is a 225-lb, 8-inch round of the kind fired by heavy cruiser HMS Exeter. The replica shell on the right is a 90-lb, 6-inch round of the type fired by light cruisers HMS Ajax and Achilles. |
 |
| A scale model of the 7,270 ton HMS Leander, a light cruiser of the New Zealand Division of the British Royal Navy. The ship was later transferred to New Zealand and recommissioned as HMNZS Leander in September 1941. |
 |
| A display on HMS/HMNZS Leander's operations during the Second World War, including its sinking of the Italian raider Ramb 1 in the Indian Ocean on 27 February 1941. Leander's captain had suspected that Italian raiders were using a particular sea lane near the Maldive Islands, an intuition that proved correct when he intercepted Ramb 1 on the morning of the 27th. After trying to disguise itself as a British merchantman, Ramb 1 opened fire on Leander, to which Leander responded with its 6-inch guns. Ramb I burned for a time after her crew abandoned ship in lifeboats, and then a series of explosions tore through her. Ramb 1 sank shortly thereafter. |
 |
| A view of the main gallery of the Torpedo Bay Navy Museum. |
 |
| A display on the minesweepers HMNZS Moa, Kiwi, and Tui. Moa and Kiwi, along with senior ship HMNZS Matai formed the 25th Minesweeping Flotilla in the Soloman Islands during the Second World War, where they escorted convoys, conducted anti-submarine patrols, and supported American ground forces during the Solomans campaign. Moa and Kiwi battled and sank the bigger, more heavily-armed Japanese submarine I-1 on the night of 29 January 1943 in the battle of Kamimbo Bay, Guadalcanal. |
 |
| One of the 5.5-inch guns from the Japanese submarine I-1, sunk by HMNZS Moa and Kiwi on the night of 29 January 1943 at Kamimbo Bay, Guadalcanal. |
 |
| A scale model of HMNZS Rotoiti, a Loch-class frigate which served in the Royal Navy as HMS Loch Katrine from December 1944 until decommissioned in May 1946. The ship was sold to the Royal New Zealand Navy in 1948 and recommissioned as HMNZS Rotoiti in May 1949. A busy post-war career included two deployments to the Korean War and support to British nuclear weapons trials at Christmas Island. HMNZS Rotoiti was withdrawn from service in 1966, sold for scrapping in 1967, and broken up in Hong Kong. |
 |
| A gallery of assorted naval artefacts and scale models. |
 |
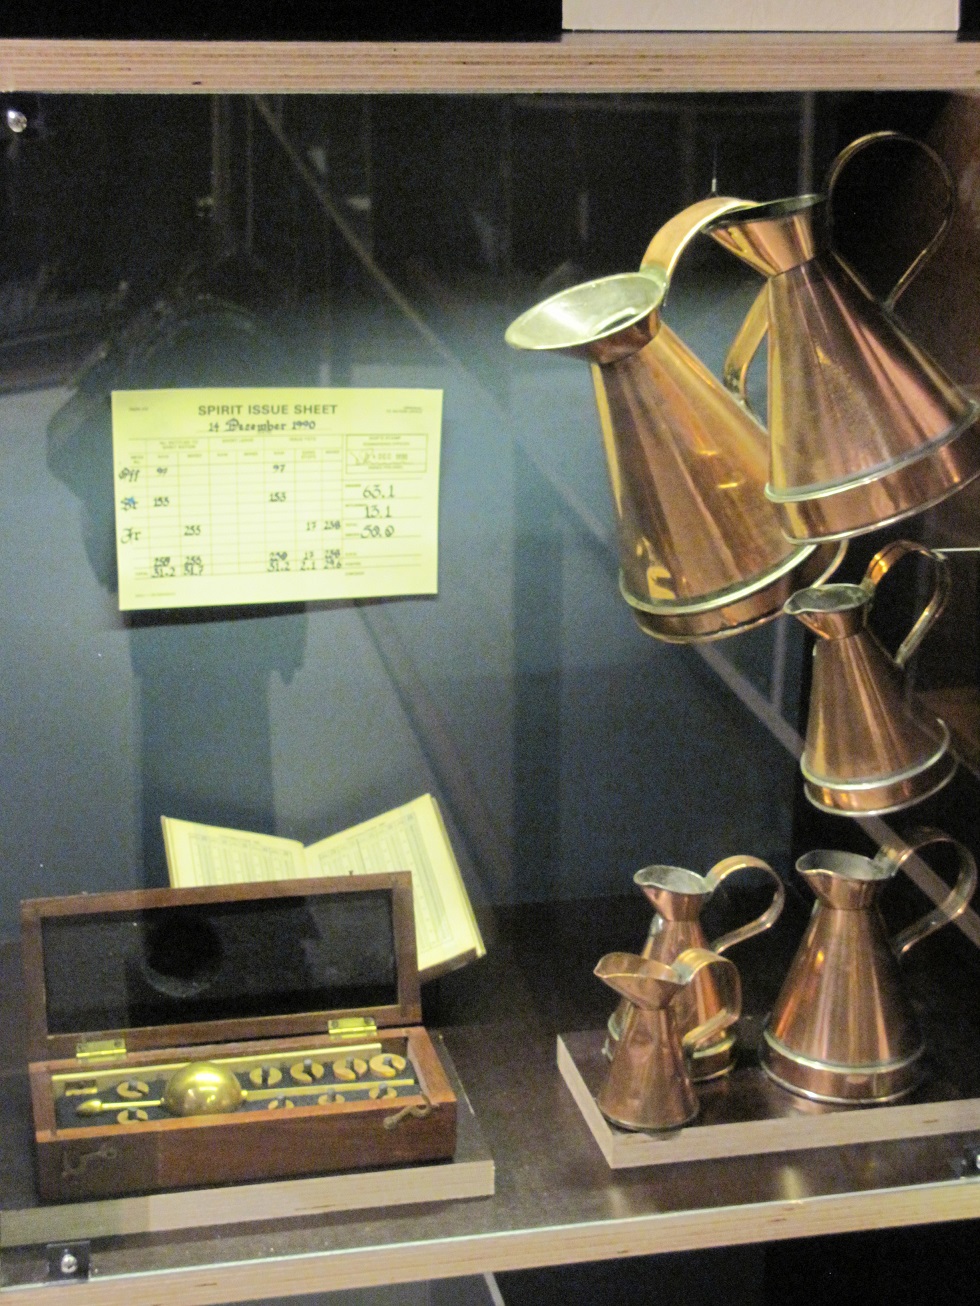
| A display of copper decanters used to issue the rum ration to sailors when this custom was still practiced aboard Royal New Zealand Navy ships. |
 |
| A binnacle from a Royal New Zealand Navy vessel. |
 |
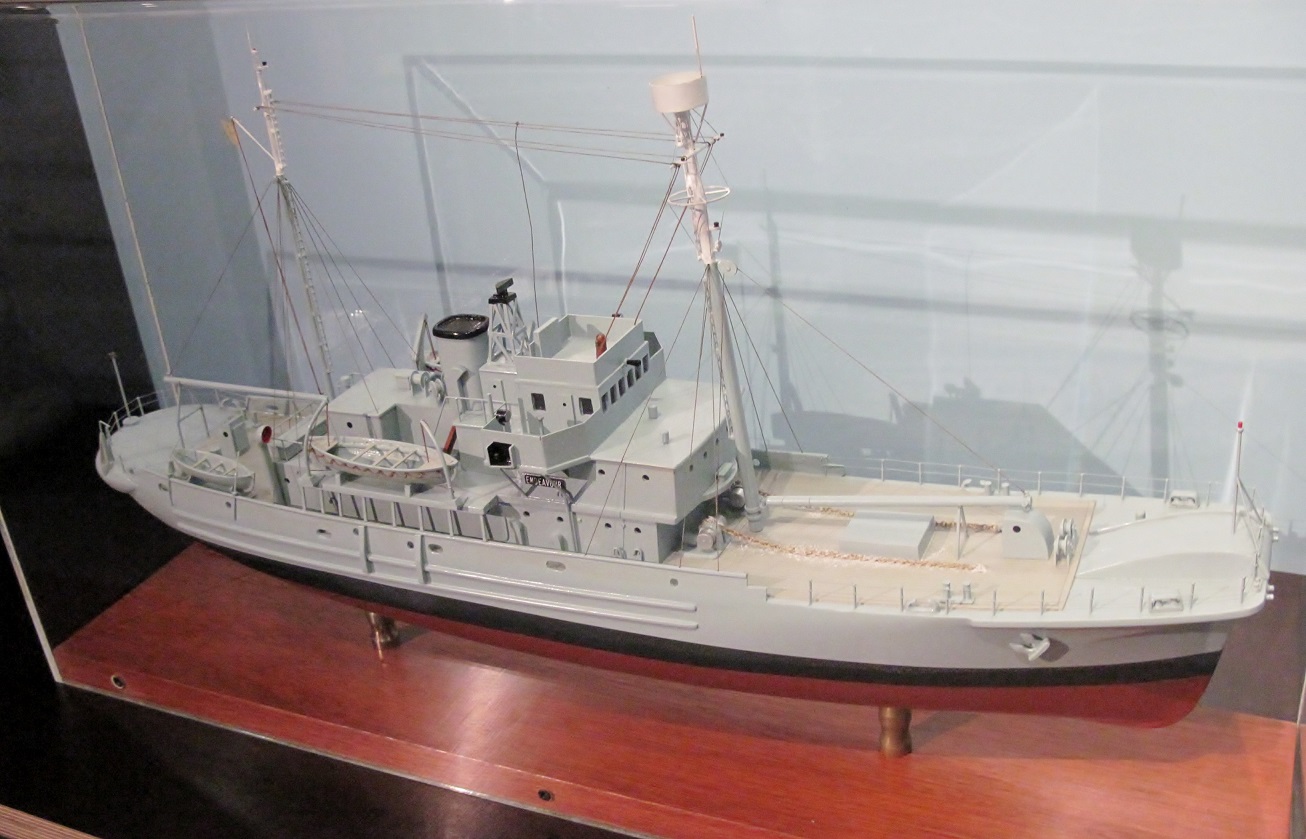
| A scale model of the 1,275 ton Ailanthus-class netlayer HMNZS Endeavour. Built in the United States in 1944, Endeavour was eventually sold to New Zealand in August 1956 to serve as an Antarctic support vessel, carrying 34 officers and ratings, as well as 18 civilians. Sold to Canadian buyers in 1962, the ship, renamed Arctic Endeavour, served as a sealing vessel but foundered off the Newfoundland coast in November 1982. |
 |
A display of photos and films of Royal New Zealand Navy personnel over the years.
|
 |
| A scale model of the Rothesay-class (Type 12) frigate HMNZS Otago (F111). Displacing 2,110 tons, the 370-foot long Otago carried up to 240 officers and ratings, and was armed with two 4.5-inch guns, one 40mm gun, two Limbo anti-submarine mortars, and torpedo launchers. Two steam turbines could propel the ship at speeds up to 30 knots (56 km/h), with a range of 5,200 nautical miles (9,630 km) at a cruising speed of 12 knots. |
 |
| Part of the gallery dedicated to the Royal New Zealand Navy's post-war operations in support of regional and international peace and security. |
 |
| The A.D. Boyle Room, built into the side of a cliff in 1898 and originally called the Test Room. The room was used between 1898 and 1907 to operate and manage the live submarine mine network used to defend Auckland Harbour. The room now houses a variety of artefacts commemorating the Royal New Zealand Navy's role in the First World War. |
 |
A mahogany sideboard from the Admiral's dining cabin aboard the battlecruiser HMS New Zealand. After the ship was scrapped, the sideboard was shipped to Wellington, New Zealand and placed in the Members and Spouses Lounge in the Parliament Buildings. When the Parliament Buildings were refurbished in 1992, the sideboard was given to the Royal New Zealand Navy and refurbished by personnel at the Devonport Naval Base.
|
 |
| The coat of the Royal Arms from HMS Philomel, which was hung in the Navy Office before being transferred to the Torpedo Bay Navy Museum in 1992. |
 |
| A painting of HMS Philomel in the Mediterranean in 1915, by Colin Wynn. Presented to the Torpedo Bay Navy Museum in 1991. |
 |
| A painting of the battlecruiser HMS New Zealand by Gerald Burn, 1913. This canvas originally hung in New Zealand House in London and was returned to New Zealand in 1998; placed in museum storage, the painting has only been placed on brief public display twice. |
 |
| The museum's boat shed houses a variety of historic small boats used by the Royal New Zealand Navy. |
 |
| Notable boats in the museum's collection include a 32-foot cutter, a 27-foot whaler, a 33-foot sailing gig, and a 14-foot clinker-built sailing dinghy. |
 |
| Waves wash over the lower ends of launching ramps leading down from the boat shed. |


